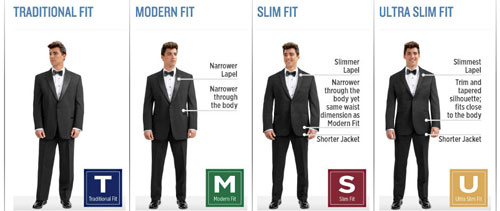
JACKET SIZE:
PANT SIZE:
SHIRT SIZE:
OVERARM MEASUREMENT
With the gentleman’s arms at his side, place the tape around the broadest part of the chest and arms. Stand to the side of the gentleman to ensure the tape is level on both sides. Pull the tape until you feel tension and then record your measurement (do not take loose tape measurements). Do not place any of your fingers between the tape and the gentleman’s chest.

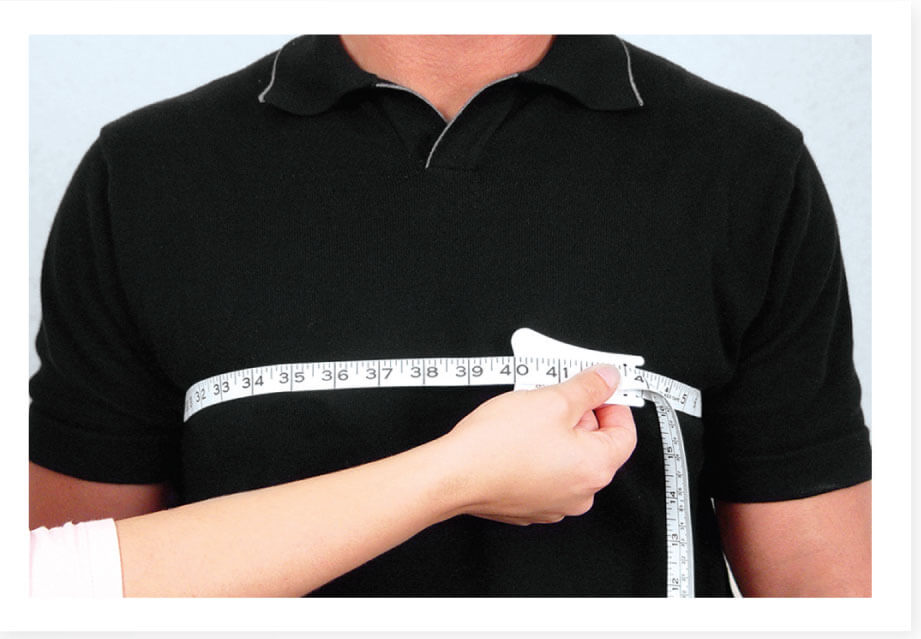
CHEST MEASUREMENT
Ask the gentleman to move his arms outward. Place the tape under his arms and around the broadest part of his chest. Have the gentleman lower his arms to his side and relax. Stand to the side of the gentleman to ensure the tape is level on both sides. Pull the tape until you feel tension and then record your measurement (do not take loose tape measurements). Do not place any of your fingers between the tape and the gentleman’s chest.
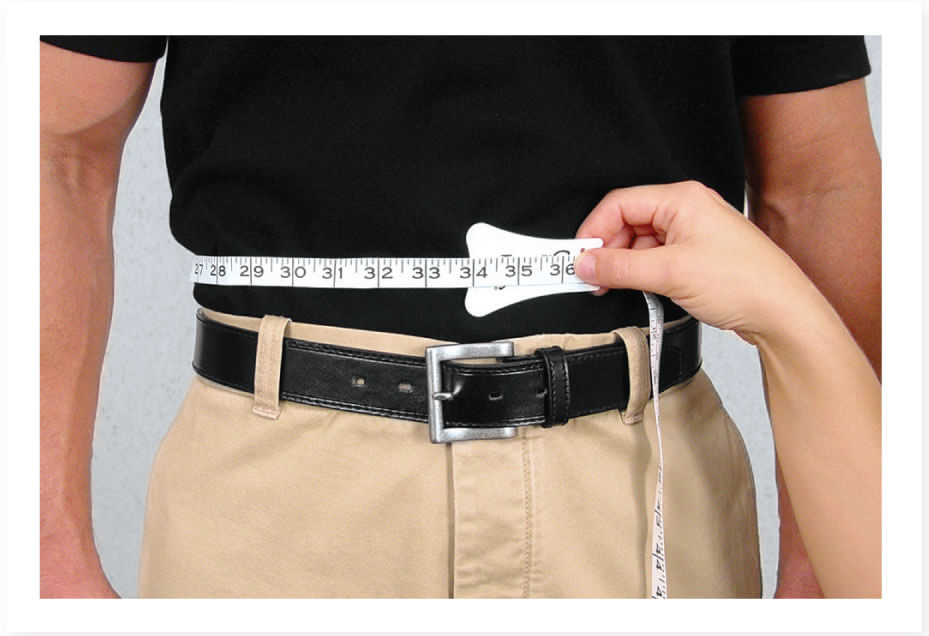
PANT WAIST MEASUREMENT
Place tape around gentleman’s waist an inch below his navel. Pull the tape until you feel tension and record your measurement (do not take loose tape measurements).
If the gentleman wears his pant below his stomach, record both the pant waist and stomach measurement. Important: the gentleman’s hip measurement minus 6 inches informs us that the gentleman cannot wear a pant waist lower than that number (pant pockets will pull).
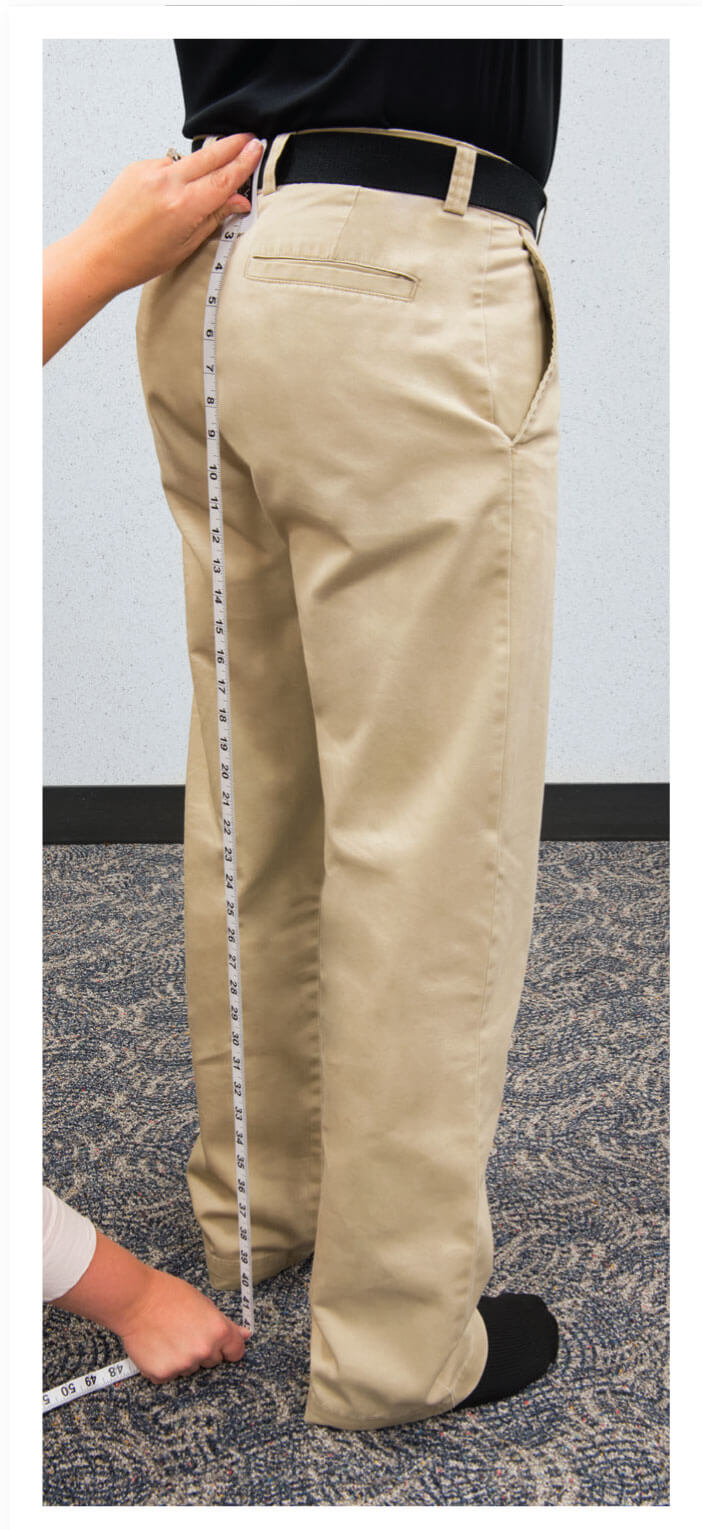
OUTSEAM MEASUREMENT
Ask the gentleman to REMOVE HIS SHOES and look straight ahead during the measurement process. Start the tape measure level with the waistband at the back of his pant and stretch the tape to the floor (with the gentleman’s shoes off). Record this measurement.
Adjust and record the gentleman’s outseam measurement based on his pant break preference:
- Full Break – Subtract 0” off your outseam measurement
- Half Break – Subtract 1” off your outseam measurement
- Quarter Break – Subtract 1.5” off your outseam measurement
- No Break – Subtract 2” off your outseam measurement
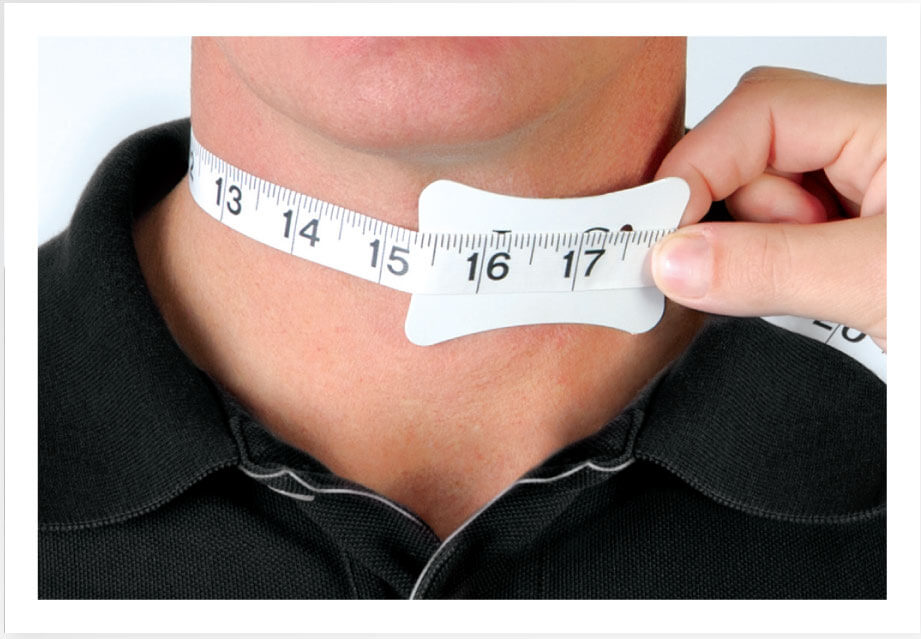
SHIRT NECK MEASUREMENT
Place tape around neck at the level where the shirt’s collar would be buttoned. Do not place any fingers between the tape. Add 1” to the measurement for the correct neck size. In the example above, a 15.5” neck measurement was taken, so a 16.5” neck size would be recorded.
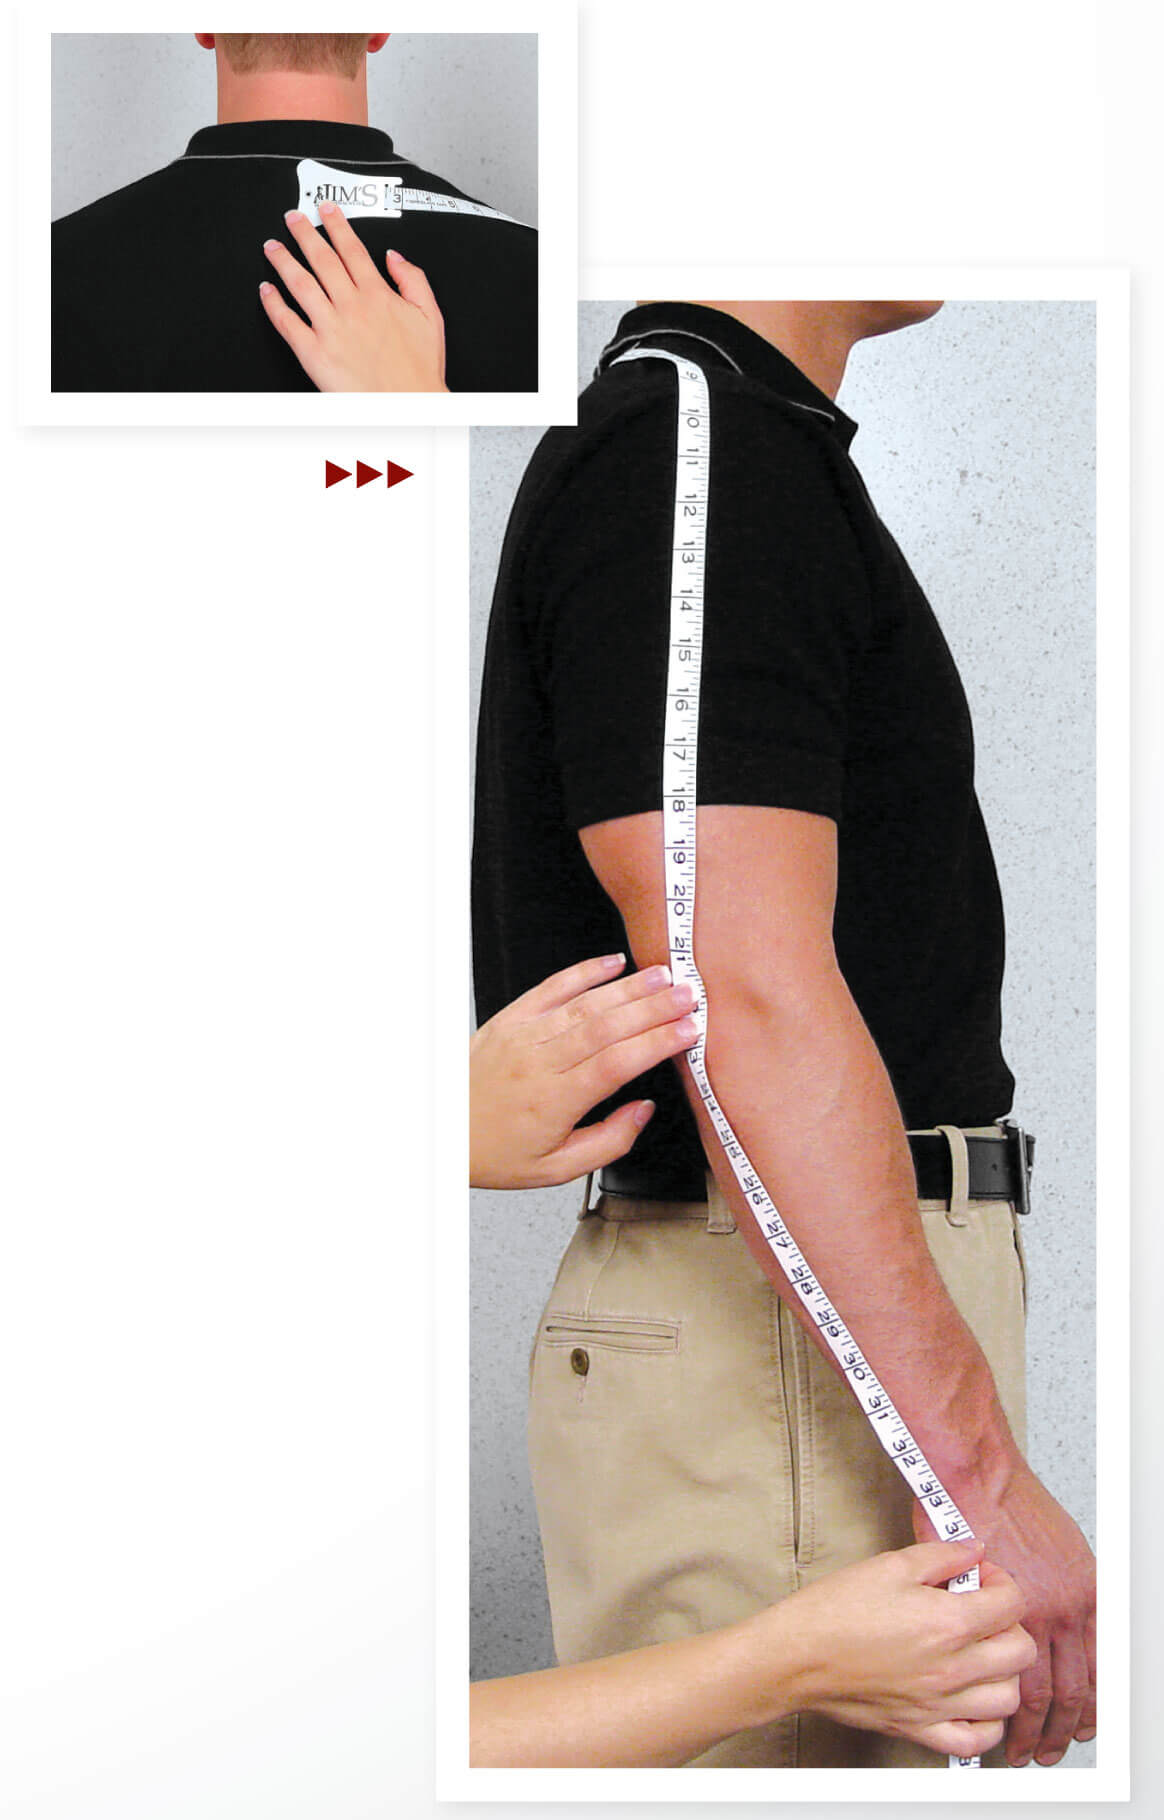
SHIRT SLEEVE MEASUREMENT
Start the tape at the base of the neck centered with the spine. Make sure the tape measure goes over the top of the gentleman’s shoulder. Take the tape down the arm to the point of their elbow and then measure an inch past the wrist bone. It is always better to measure long versus short because a sleeve that is too short will likely be unacceptable to your customer.
HIP MEASUREMENT
Stand to the side of the gentleman and place the tape around the broadest part of his hip. Pull the tape until you feel tension and record your measurement (do not take loose tape measurements).